
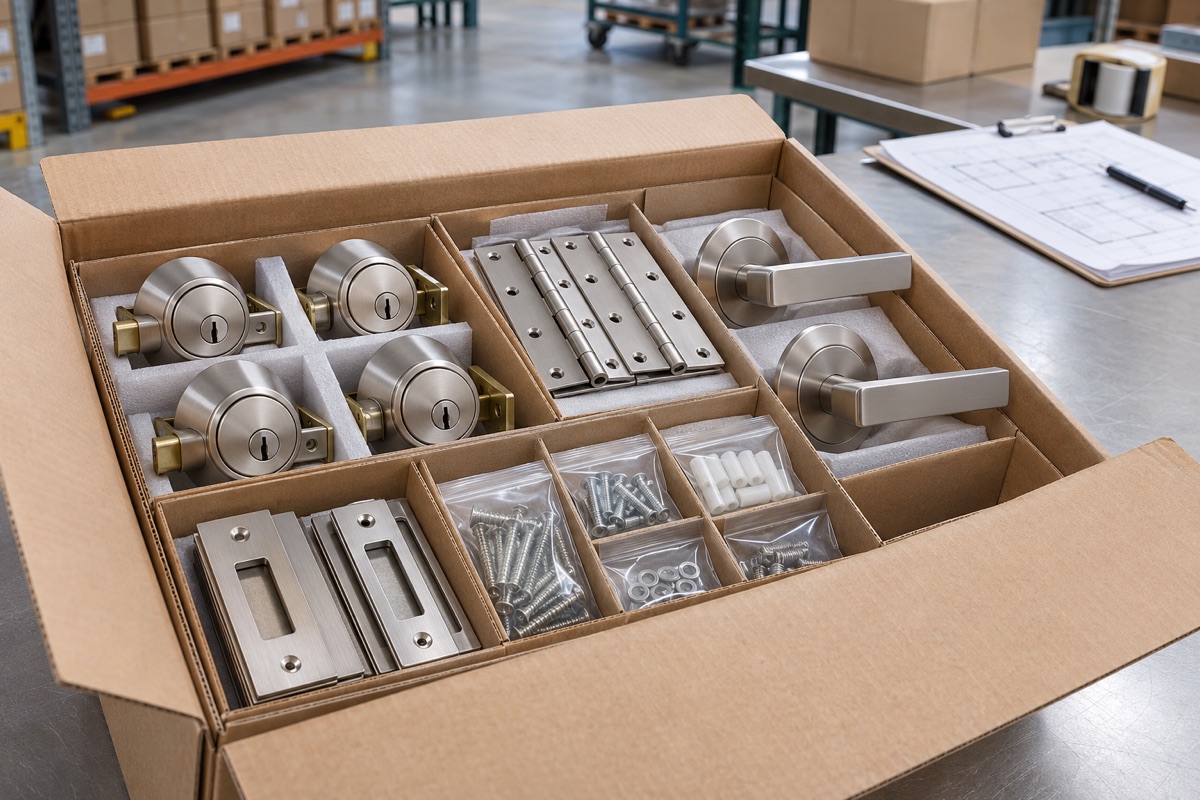
Residential, hotel and commercial projects may combine lock bodies, levers, roses, hinges, cylinders and small installation parts. Even when a carton contains the correct items, assigning them to the wrong door can create rework and delay on site. Link the carton plan to door and project identifiers from the order lines onward.
Link the bill of materials to each door number
Record order variables for every door, including hardware type, handing, finish, lock grade, cylinder and mounting fasteners. Schlage’s parts and hardware descriptions illustrate that a door lock has multiple components; the selected model and installation compatibility for a project still need to be confirmed against its drawings and manufacturer instructions.
Do not pour levers or locks for different door types into one carton. Separate inner packs, dividers or a colour cue may be used for each door number or room group, but colour alone is not product identification. Match project, floor/room, door number, SKU and quantity fields to the order data.
Protect finishes and small components
Place parts in separate pockets to prevent finish surfaces from rubbing. Keep screws, hex keys and small fasteners in countable closed inner packs; check that sharp edges cannot damage a lever, rose or carton. Give any model-specific pouch or surface protection specified by the manufacturer priority in the packing instruction.
An insert limits movement during transit; it does not change the lock body’s strength or the product’s security certification. Reduce unnecessary voids without compressing finished hardware. After closing a sample carton, move it gently to check for collisions or loose-part noise.
Carton closure and project pallets
Choose carton dimensions around the set’s total volume and weight. Carton tape closes the flaps; it does not by itself keep inner packs closed or assign the hardware to the correct door. If printed tape is used, ensure it does not cover the project identity label or weaken traceability for each variant.
For a large shipment to one floor or project area, separate pallets by building, floor or installation phase. Stack cases evenly and unitize them with stretch film, checking that tension does not crush cartons and project barcodes remain visible. GS1’s logistics-label guideline is a reference for identifying logistics units such as pallets.
Site receipt and missing-component tracking
Before loading, scan carton labels, inner kit lists and order quantities together. At receipt, group cartons by floor and room and log damaged or incomplete sets separately. This helps site teams move packs to the correct location before opening them and trace missing components back to an order line.
When changing the insert layout, prepare a trial pack with the same door set and verify it along the warehouse handling route. ISTA’s design and testing guidance provides a framework for selecting an appropriate test; project acceptance criteria and installation compatibility remain with the manufacturer and project leads.
Sources and further reading
- Schlage — Parts of a door lock and door hardware terms
- ISTA — Getting Started with Design & Testing
- GS1 — Logistic Label Guideline
Accessed 7 November 2026. Confirm current product specifications, carrier requirements and applicable local rules before shipment.
Plan packaging around your operation
Share product dimensions, case layout and dispatch conditions so the suitable Biz2miz packaging options can be reviewed.
Frequently asked questions
Can door hardware sets for different doors share one carton?
They can, but each kit should be separately identified by door or room group and matched to the carton list.
Does carton tape keep small screw packs closed?
No. Screws belong in closed inner packs; carton tape closes the outer case flaps.
What should remain visible on a project pallet?
The project or floor identity, pallet/logistics-unit number and scannable order label should remain readable.